One of the things that has been long overdue on my personal to-do list is to get back into blogging. With the general availability of the new .dev domain last week, I decided it was finally time to take the plunge after buying a fancy new vanity domain. This blog post will describe how I setup a new blog using Hugo for the static site, Docker and NGINX for deployment, and Amazon ECR and ECS for hosting.
Directory Structure
We have a bunch of different files that we will be keeping track of, from the files that make up our actual blog to the build and infrastructure files we need to build the Docker image that will serve the website. I settled on the directory structure below to keep everything simple, build and infrastructure files live at the top level while my actual blog files live in the src directory.
-rw-r--r--   1 sean  staff   190B Mar  4 09:06 Dockerfile
-rwxr-xr-x   1 sean  staff   386B Mar  4 10:30 build.sh
drwxr-xr-x   5 sean  staff   160B Mar  2 13:28 letsencrypt
-rw-r--r--   1 sean  staff   1.9K Mar  4 12:02 nginx.conf
drwxr-xr-x  11 sean  staff   352B Mar  4 12:20 src
To keep things out version control that shouldn’t be there like the generated website and SSL certificates, there’s a very simple .gitignore file to keep things tidy.
src/public
letsencrypt/
Generating the SSL Certificate
One of the first things we need to do is generate an SSL certificate to use for our site. The cool thing about the new .dev domain is that Google requires that any site using the TLD must support HSTS before Chrome will load it. That means that HTTPS is now required for your site if you want Chrome users to have access to it. In the old days this would require shelling out a decent bit of money but nowadays good certs are free thanks to the Let’s Encrypt project.
We will use certbot from the Electronic Frontier Foundation to generate our initial certificate. We will use certbot in manual mode to generate the certificate, we will then copy the generated certificate to our Docker image in a later step:
certbot --manual certonly \
  --config-dir=letsencrypt/config \
  --work-dir=letsencrypt/work \
  --logs-dir=letsencrypt/logs \
  --preferred-challenges=dns
Certbot will then guide you through the steps needed to generate an SSL certificate for your domain. When the certificate gets closer to expiring, you’ll need to re-run this step to generate a new certificate and then publish a new Docker image.
Creating the Docker Image
We’re now ready to build our Docker image to serve up our static blog site complete with SSL support. We’ll create a basic NGINX config that serves up some static files and redirects HTTP requests to HTTPS:
events {
  worker_connections  4096;  ## Default: 1024
}

http {
    server_tokens off;
    keepalive_timeout 20s;
    sendfile on;
    tcp_nopush on;
    access_log off;

    include mime.types;
    default_type application/octet-stream;
    charset_types text/css text/plain text/vnd.wap.wml application/javascript application/json application/rss+xml application/xml;

    gzip on;
    gzip_vary on;
    gzip_min_length 1000;
    gzip_proxied expired no-cache no-store private auth;
    gzip_types text/plain text/css text/xml text/javascript application/x-javascript application/xml;

    server {
        listen 8080;
        server_name seangrimes.dev www.seangrimes.dev;

        access_log /dev/stdout;
        error_log /dev/stdout;
        return 301 https://$host$request_uri;
    }

    server {
        listen 4443 ssl;
        server_name seangrimes.dev www.seangrimes.dev;

        # Needed for HSTS
        add_header Strict-Transport-Security "max-age=31536000; includeSubDomains" always;

        # Needed for CORS
        add_header Access-Control-Allow-Origin *;
        add_header Access-Control-Allow-Methods GET;

        access_log /dev/stdout;
        error_log /dev/stdout;

        root /var/www/public;

        ssl_certificate      /etc/letsencrypt/live/seangrimes.dev/fullchain.pem;
        ssl_certificate_key  /etc/letsencrypt/live/seangrimes.dev/privkey.pem;

        # Improve HTTPS performance with session resumption
        ssl_session_cache shared:SSL:10m;
        ssl_session_timeout 10m;

        # Enable server-side protection against BEAST attacks
        ssl_protocols TLSv1.2;
        ssl_prefer_server_ciphers on;
        ssl_ciphers "ECDHE-ECDSA-AES256-GCM-SHA384:ECDHE-RSA-AES256-GCM-SHA384:ECDHE-ECDSA-CHACHA20-POLY1305:ECDHE-RSA-CHACHA20-POLY1305:ECDHE-ECDSA-AES256-SHA384:ECDHE-RSA-AES256-SHA384";

        # Enable OCSP stapling
        # ref. http://blog.mozilla.org/security/2013/07/29/ocsp-stapling-in-firefox
        ssl_stapling on;
        ssl_stapling_verify on;
        ssl_trusted_certificate /etc/letsencrypt/live/seangrimes.dev/fullchain.pem;
    }
}
We then need to create a simple Dockerfile that can be used to create our image:
FROM nginx

COPY src/public /var/www/public
COPY nginx.conf /etc/nginx/nginx.conf
COPY letsencrypt/config/live/seangrimes.dev/* /etc/letsencrypt/live/seangrimes.dev/

EXPOSE 8080
EXPOSE 4443
We can then use this simple shell script to generate our site and then package it up as a Docker image:
#!/usr/bin/env bash

# Build the static site
cd src/
rm -rf public/
hugo -s .

# Build the Docker image
cd ../
docker build -t blog .
Setting Up Amazon ECR
Once we have a Docker image, we’ll need to publish it somewhere so that we can run it from AWS. We’ll configure an Amazon ECR repository for this, then tag and publish our Docker image here once we’re ready to deploy it to Amazon ECS.
You’ll want to first navigate to the ECR section of the AWS Console and create a new registry to store your Docker image.
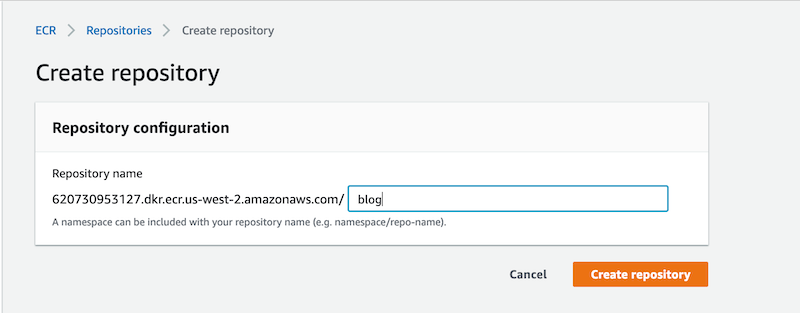
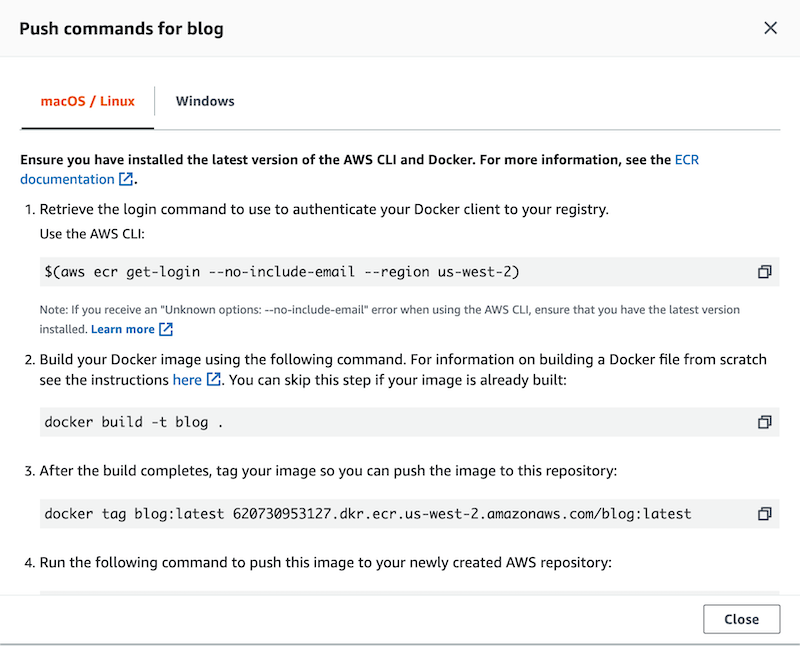
Once you’ve created the registry, you’ll want to click on it from within the AWS Console and then click on the View push commands button to see how to push your Docker image up to the registry. You’ll need to push your Docker image up to Amazon ECR before proceeding with the rest of this article.
Setting Up Amazon ECS
Believe it or not, this is where the bulk of our work will be. For Amazon ECS, we have two different approaches we can use for deploying our container image. We can use Fargate and have AWS automatically manage any computing resources we need to run our Docker container, or we can take a more manual approach and manually provision our EC2 resources we need and manage them ourselves. That includes things like making sure that OS updates are applied as well. I’m trying to keep my monthly AWS spend at around $10/mo so we’ll go with the EC2 route since that’s about 4 times cheaper than using Fargate.
Create the Cluster
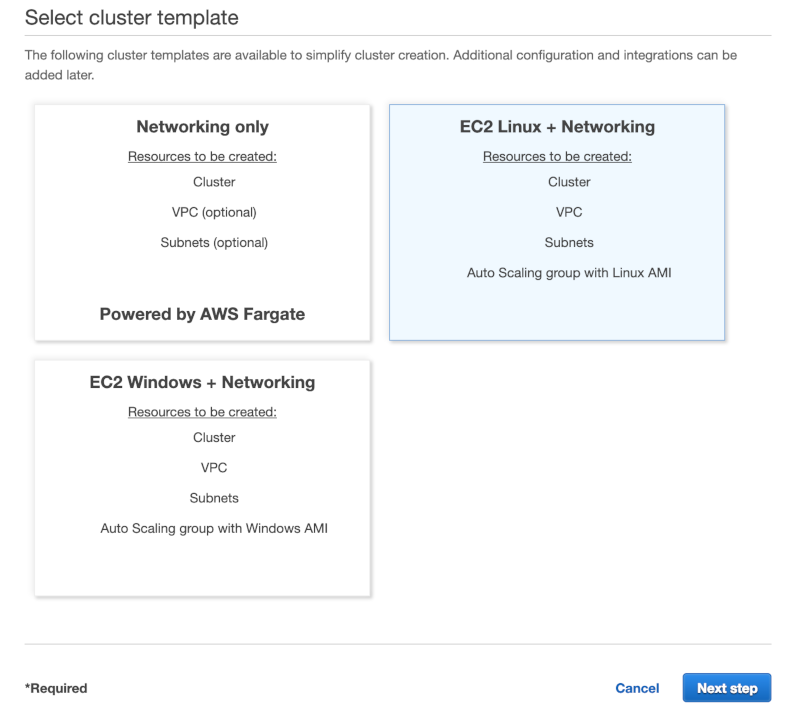
The first thing we need to do to get everything setup is to create an ECS cluster. This is simply a collection of one or more EC2 instances that we can run our container on. Navigate to ECS from within the AWS Console, then click on the Create Cluster button, and then click on the “EC2 Linux + Networking” option to proceed to the next step. Finally, click the Next Step button to continue to the next screen.
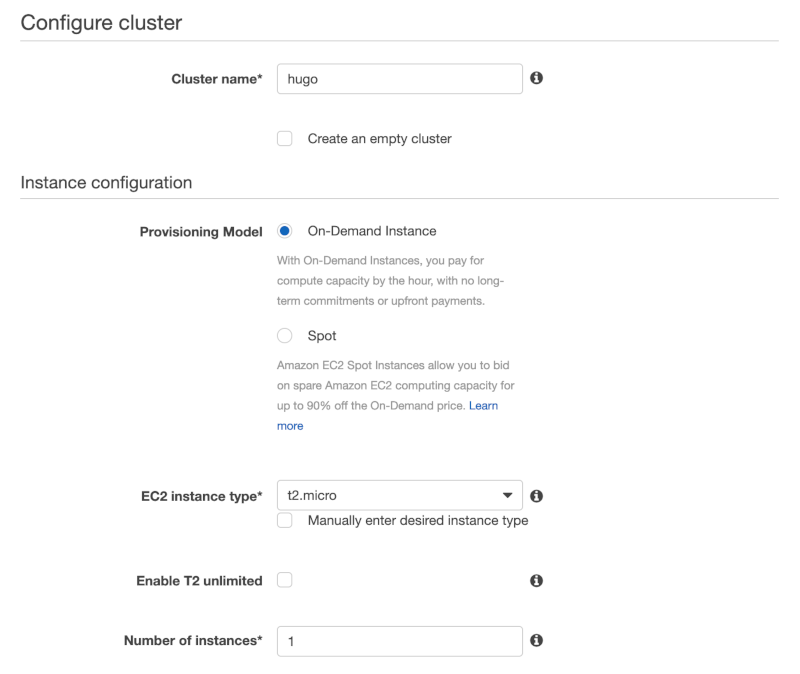
Give the cluster a name, then provision a single t2.micro on-demand instance to host our Docker image. Leave all the other options the same and then click the Create button at the bottom of the wizard.
Once the cluster finishes provisioning, you should see something similar to below.
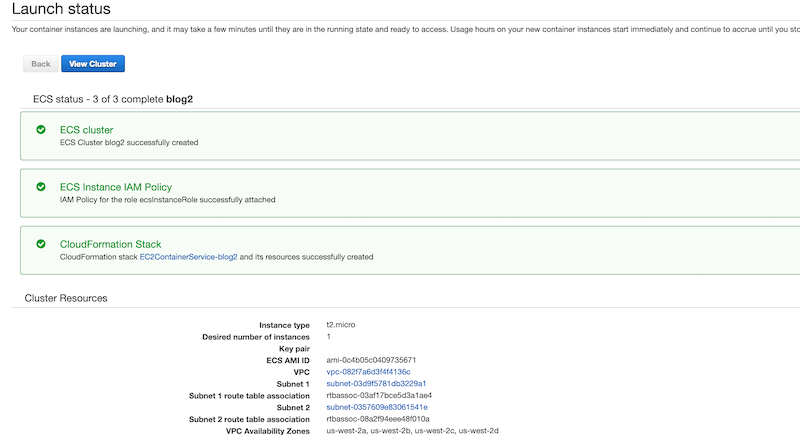
Click the View Cluster button to begin configuring the cluster.
Create the Task Definition
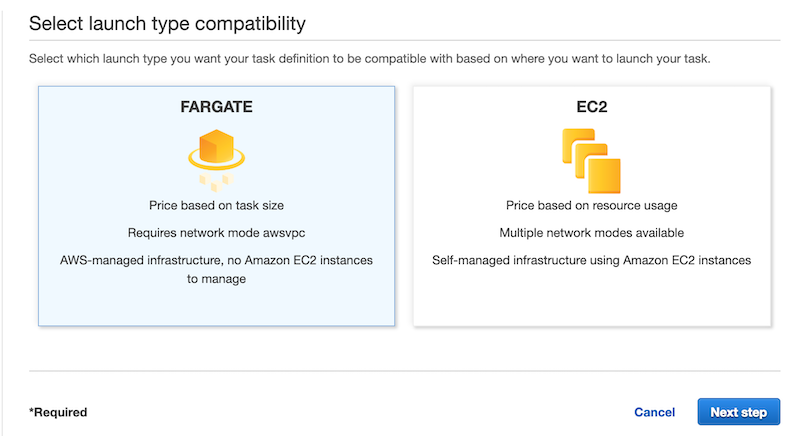
Amazon ECS uses task definitions to configure a Docker image to run on the cluster. This configuration includes things like the image to run and port mappings from the host to the container. Click the Task Definitions link in the left side of the screen, then click on the Create New Task Definition button, and then finally click on the EC2 image to create a new task definition for the Docker container.
Give the task a name and then scroll down lower and click the “Add Container” button to open the dialog below.

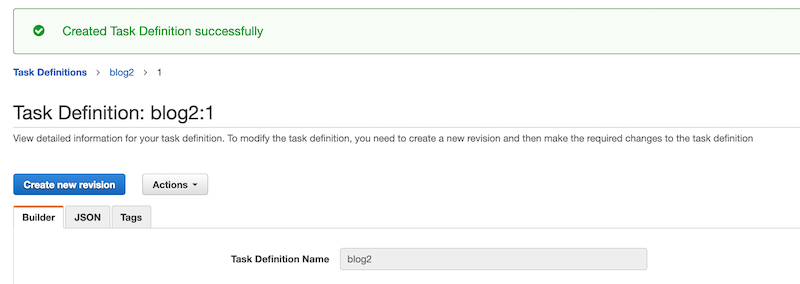
Fill out the values in the dialog to where they match up with what is in the screenshot. Note that the image name will be different from whatever you supply but the other values should match up. Click the Add button to finish creating the container, then click the Create button to finish creating the task. Once done, you should see something very similar to what’s below.
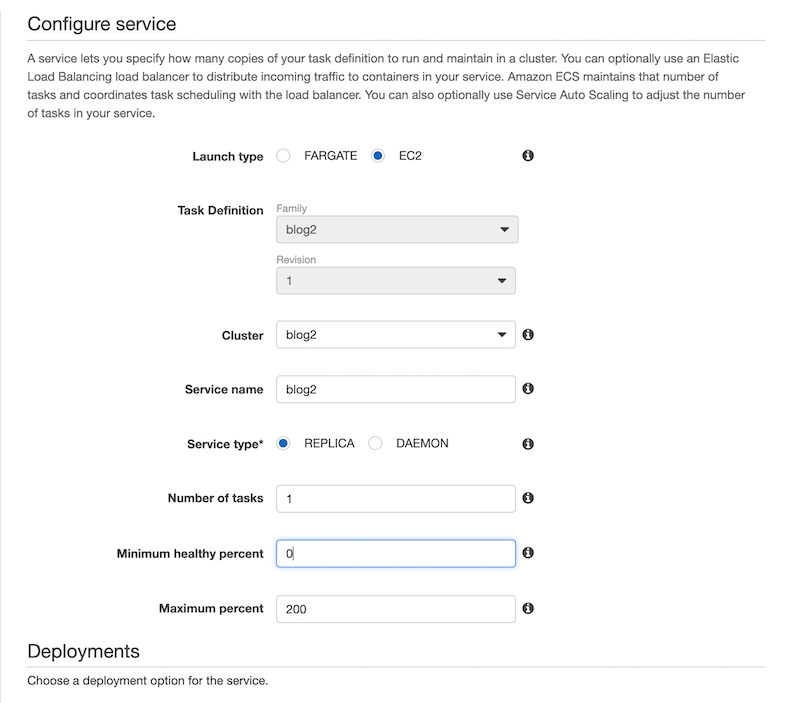
Create the Service
The final step is to schedule the task definition to run on the cluster we created earlier, click on the Actions dropdown and select Create Service to create a new service for the task. Fill in the required details for the service, paying special attention to the minimum healthy percent and maximum percent fields. Without these values, you won’t be able to push updated containers to the ECS cluster when you make an update to the site.
Once you complete the wizard, view the service you created. After a few minutes, you should see that the desired tasks count matches the running tasks count like in the image below.

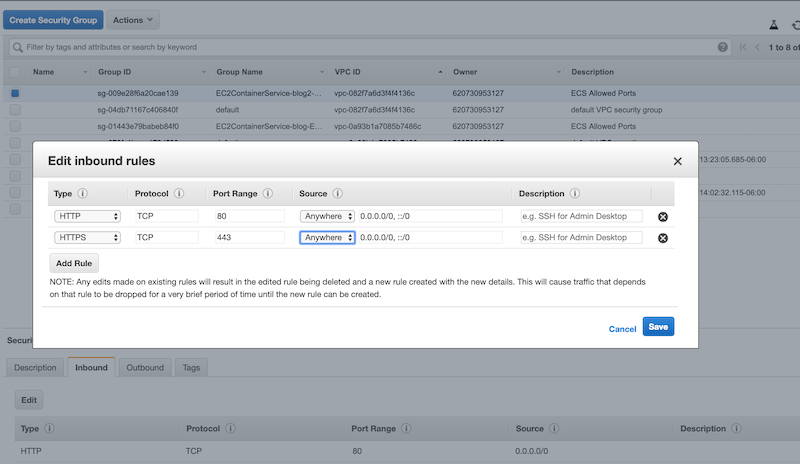
Setup the Inbound Rules
If you attempt to access the blog at this point, you’ll notice that the request will time out. That is because AWS isn’t allowing inbound network traffic to reach the container at this point. You’ll need to update the security group for the cluster by navigating to Security Groups in the AWS Console and then clicking on the security group for your ECS cluster. The naming should be pretty predictable and will follow the rule ECSContainerService-clusterName-EcsSecurityGroup. You’ll want to click on the Inbound tab at the bottom of the screen, then click the Edit button, then update the inbound rules to look like the below:
Once this step is complete then you should be able to go to the EC2 section fo the AWS Console, find your cluster instance, and then access your blog from its public IP. At this point you will also probably want to go ahead and assign an Elastic IP to the EC2 instance as well, otherwise the IP of your cluster may change as you deploy updated Docker images to it.
Deploying Blog Updates
We can update the script that we used earlier for building our Docker image to also push our image up to our ECR repository and then force a new deployment to our ECS cluster. The only part of the script that really needs any explanation is the part where we remove any untagged images from the ECR repository. When we push a new image with the tag of latest, instead of replacing the existing image with the same tag, the existing image becomes untagged and sticks around. We don’t care about these older images and don’t want to be charged for keeping them around.
#!/usr/bin/env bash

REGION='us-west-2'
ECR_REPO='codemunkey'

# Build the static site
cd src/
rm -rf public/
hugo -s .

# Build the Docker image
cd ../
docker build -t blog .

# Publish to AWS ECR
$(aws ecr get-login --no-include-email --region $REGION)
docker tag blog:latest 620730953127.dkr.ecr.us-west-2.amazonaws.com/codemunkey:latest
docker push 620730953127.dkr.ecr.us-west-2.amazonaws.com/codemunkey:latest

# Force a new deployment to AWS ECS
aws ecs update-service --cluster blog --service blog-service --force-new-deployment

# Cleanup untagged images
IMAGES_TO_DELETE=$( aws ecr list-images --region us-west-2 --repository-name $ECR_REPO --filter "tagStatus=UNTAGGED" --query 'imageIds[*]' --output json )
aws ecr batch-delete-image --region $REGION --repository-name $ECR_REPO --image-ids "$IMAGES_TO_DELETE" || true